It started with the Japanese Crab/Seafood restaurant, followed by my custom
Fujiwara Tofu shop. Also in my collection are the trio of Cada brand
Japanese shops designed by exesandbox.
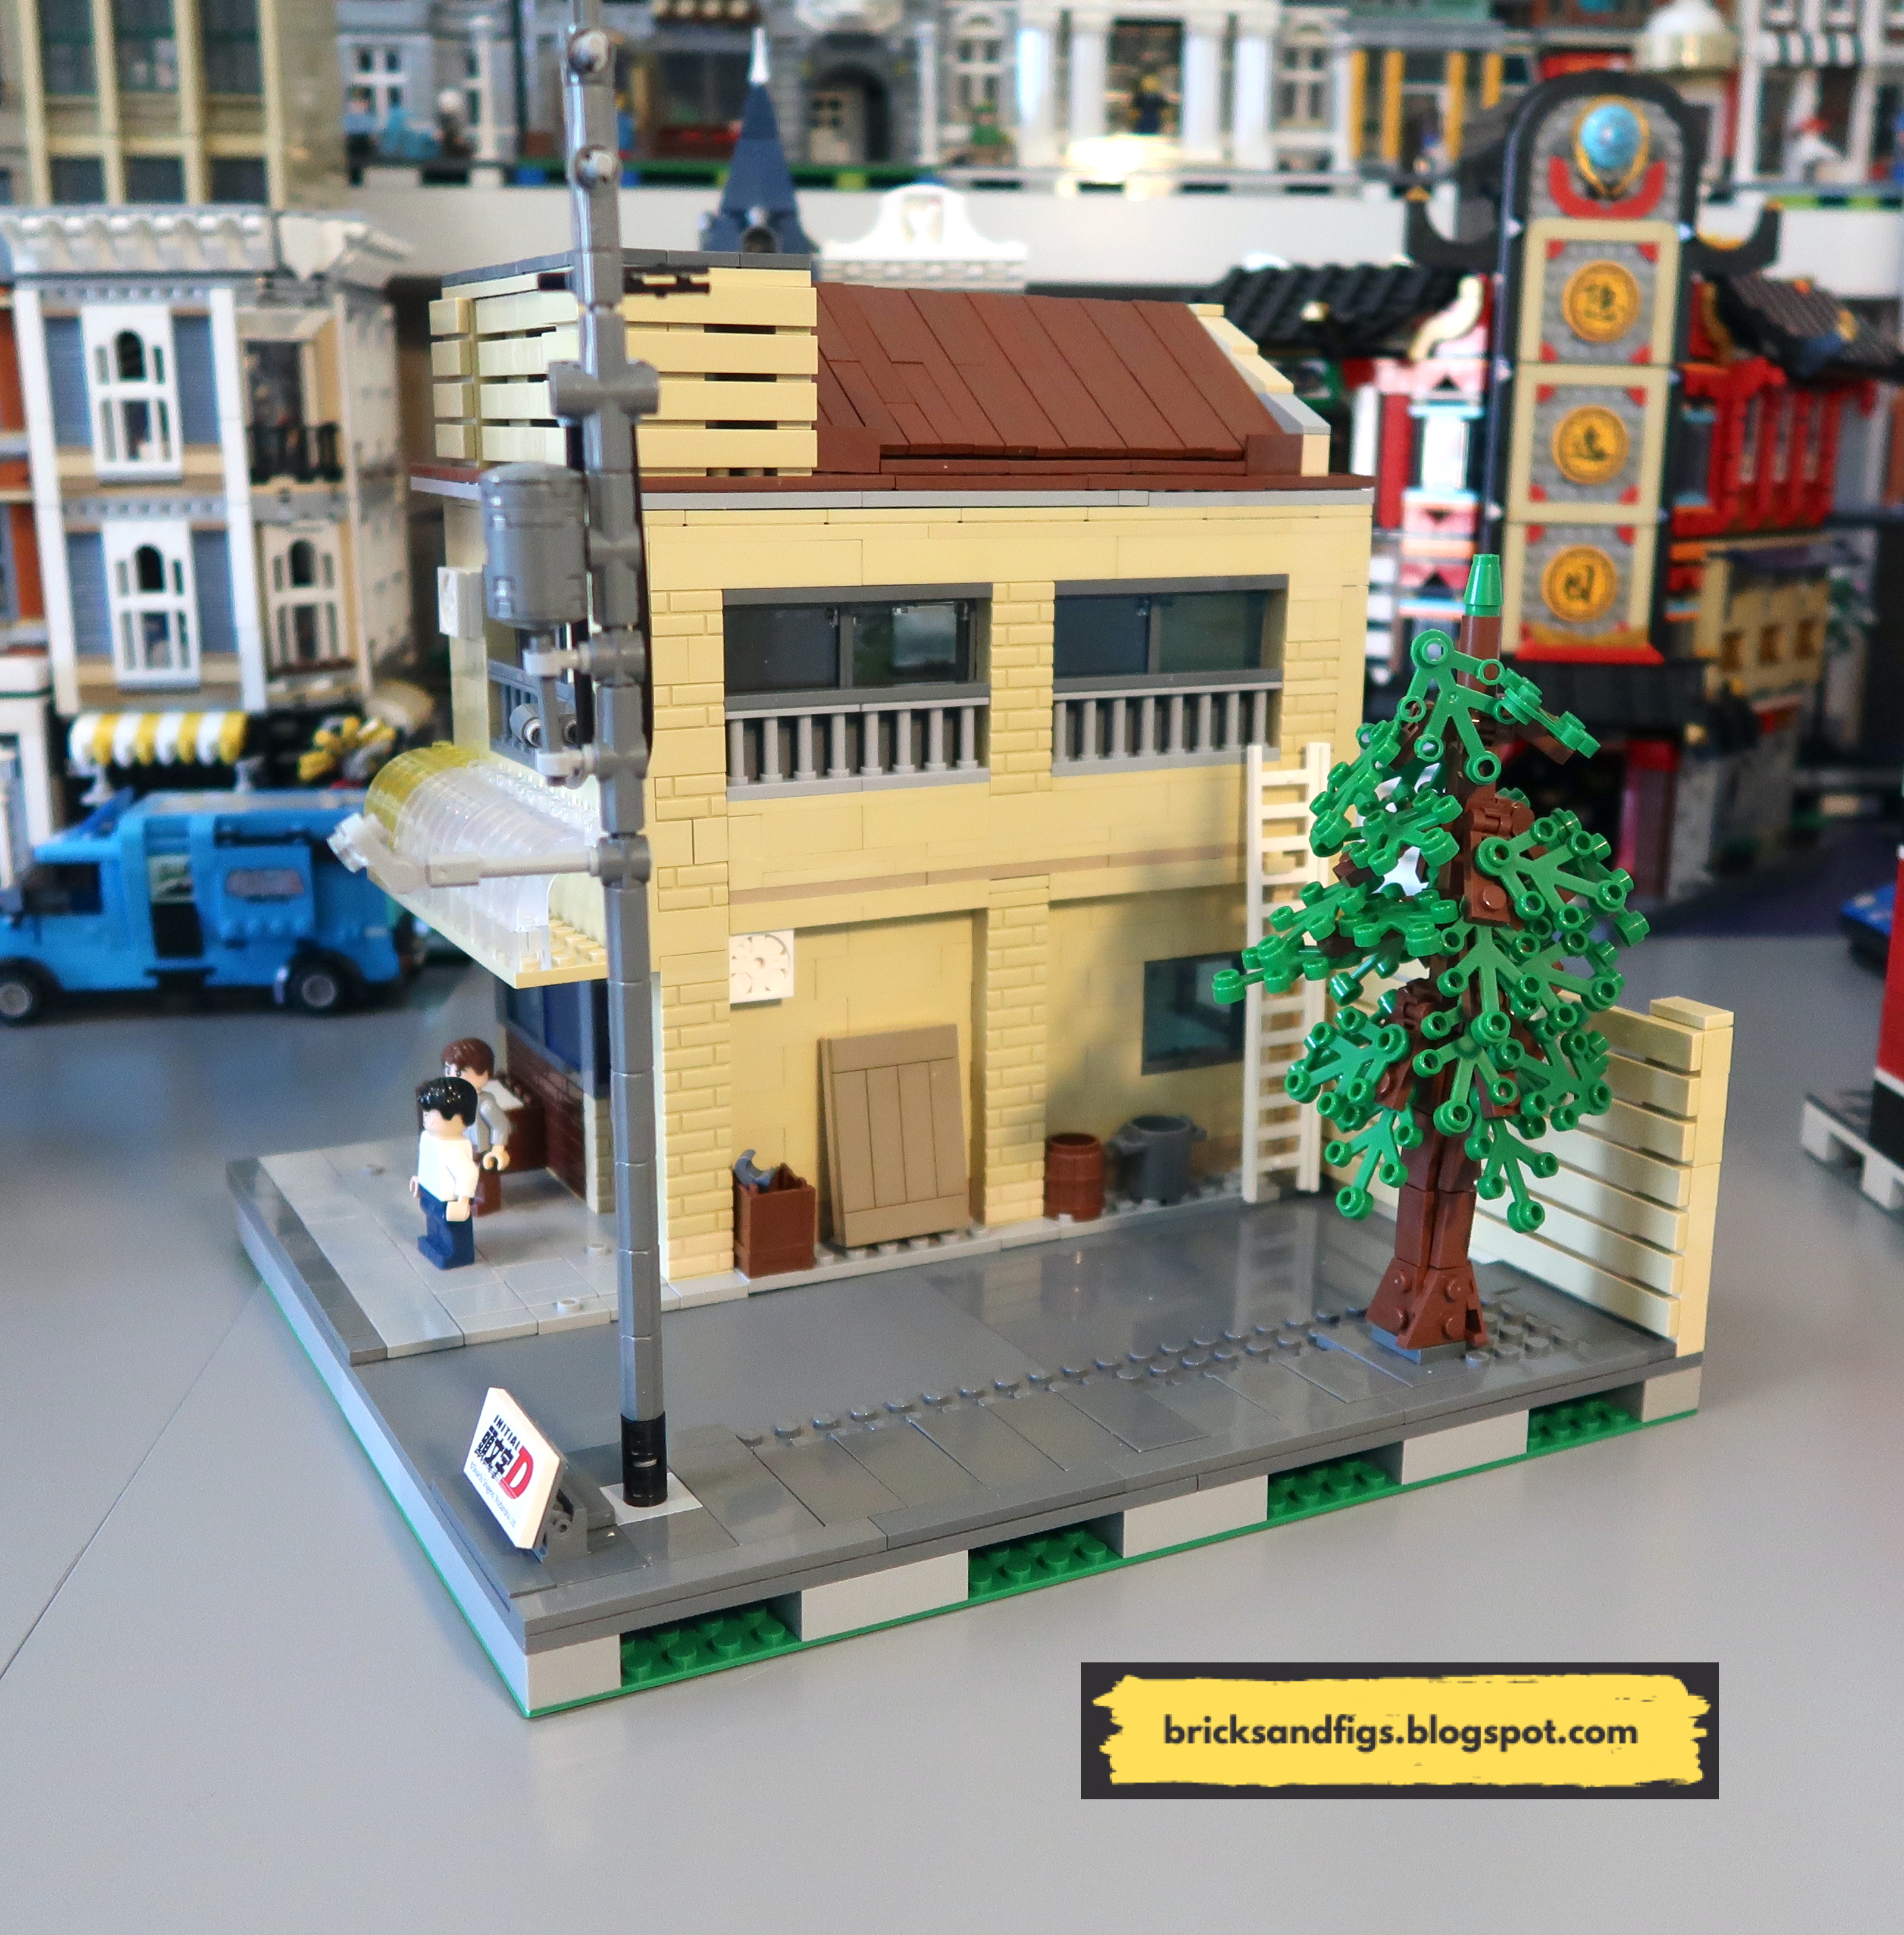
 The machiya house sits on a raised 16x32 stud baseplate and is two storeys
tall.
The machiya house sits on a raised 16x32 stud baseplate and is two storeys
tall.
 I took the set apart a couple of years ago, but luckily I still had the banner
and stickers.
Here's my original Sembo Takoyaki set review.
I took the set apart a couple of years ago, but luckily I still had the banner
and stickers.
Here's my original Sembo Takoyaki set review.
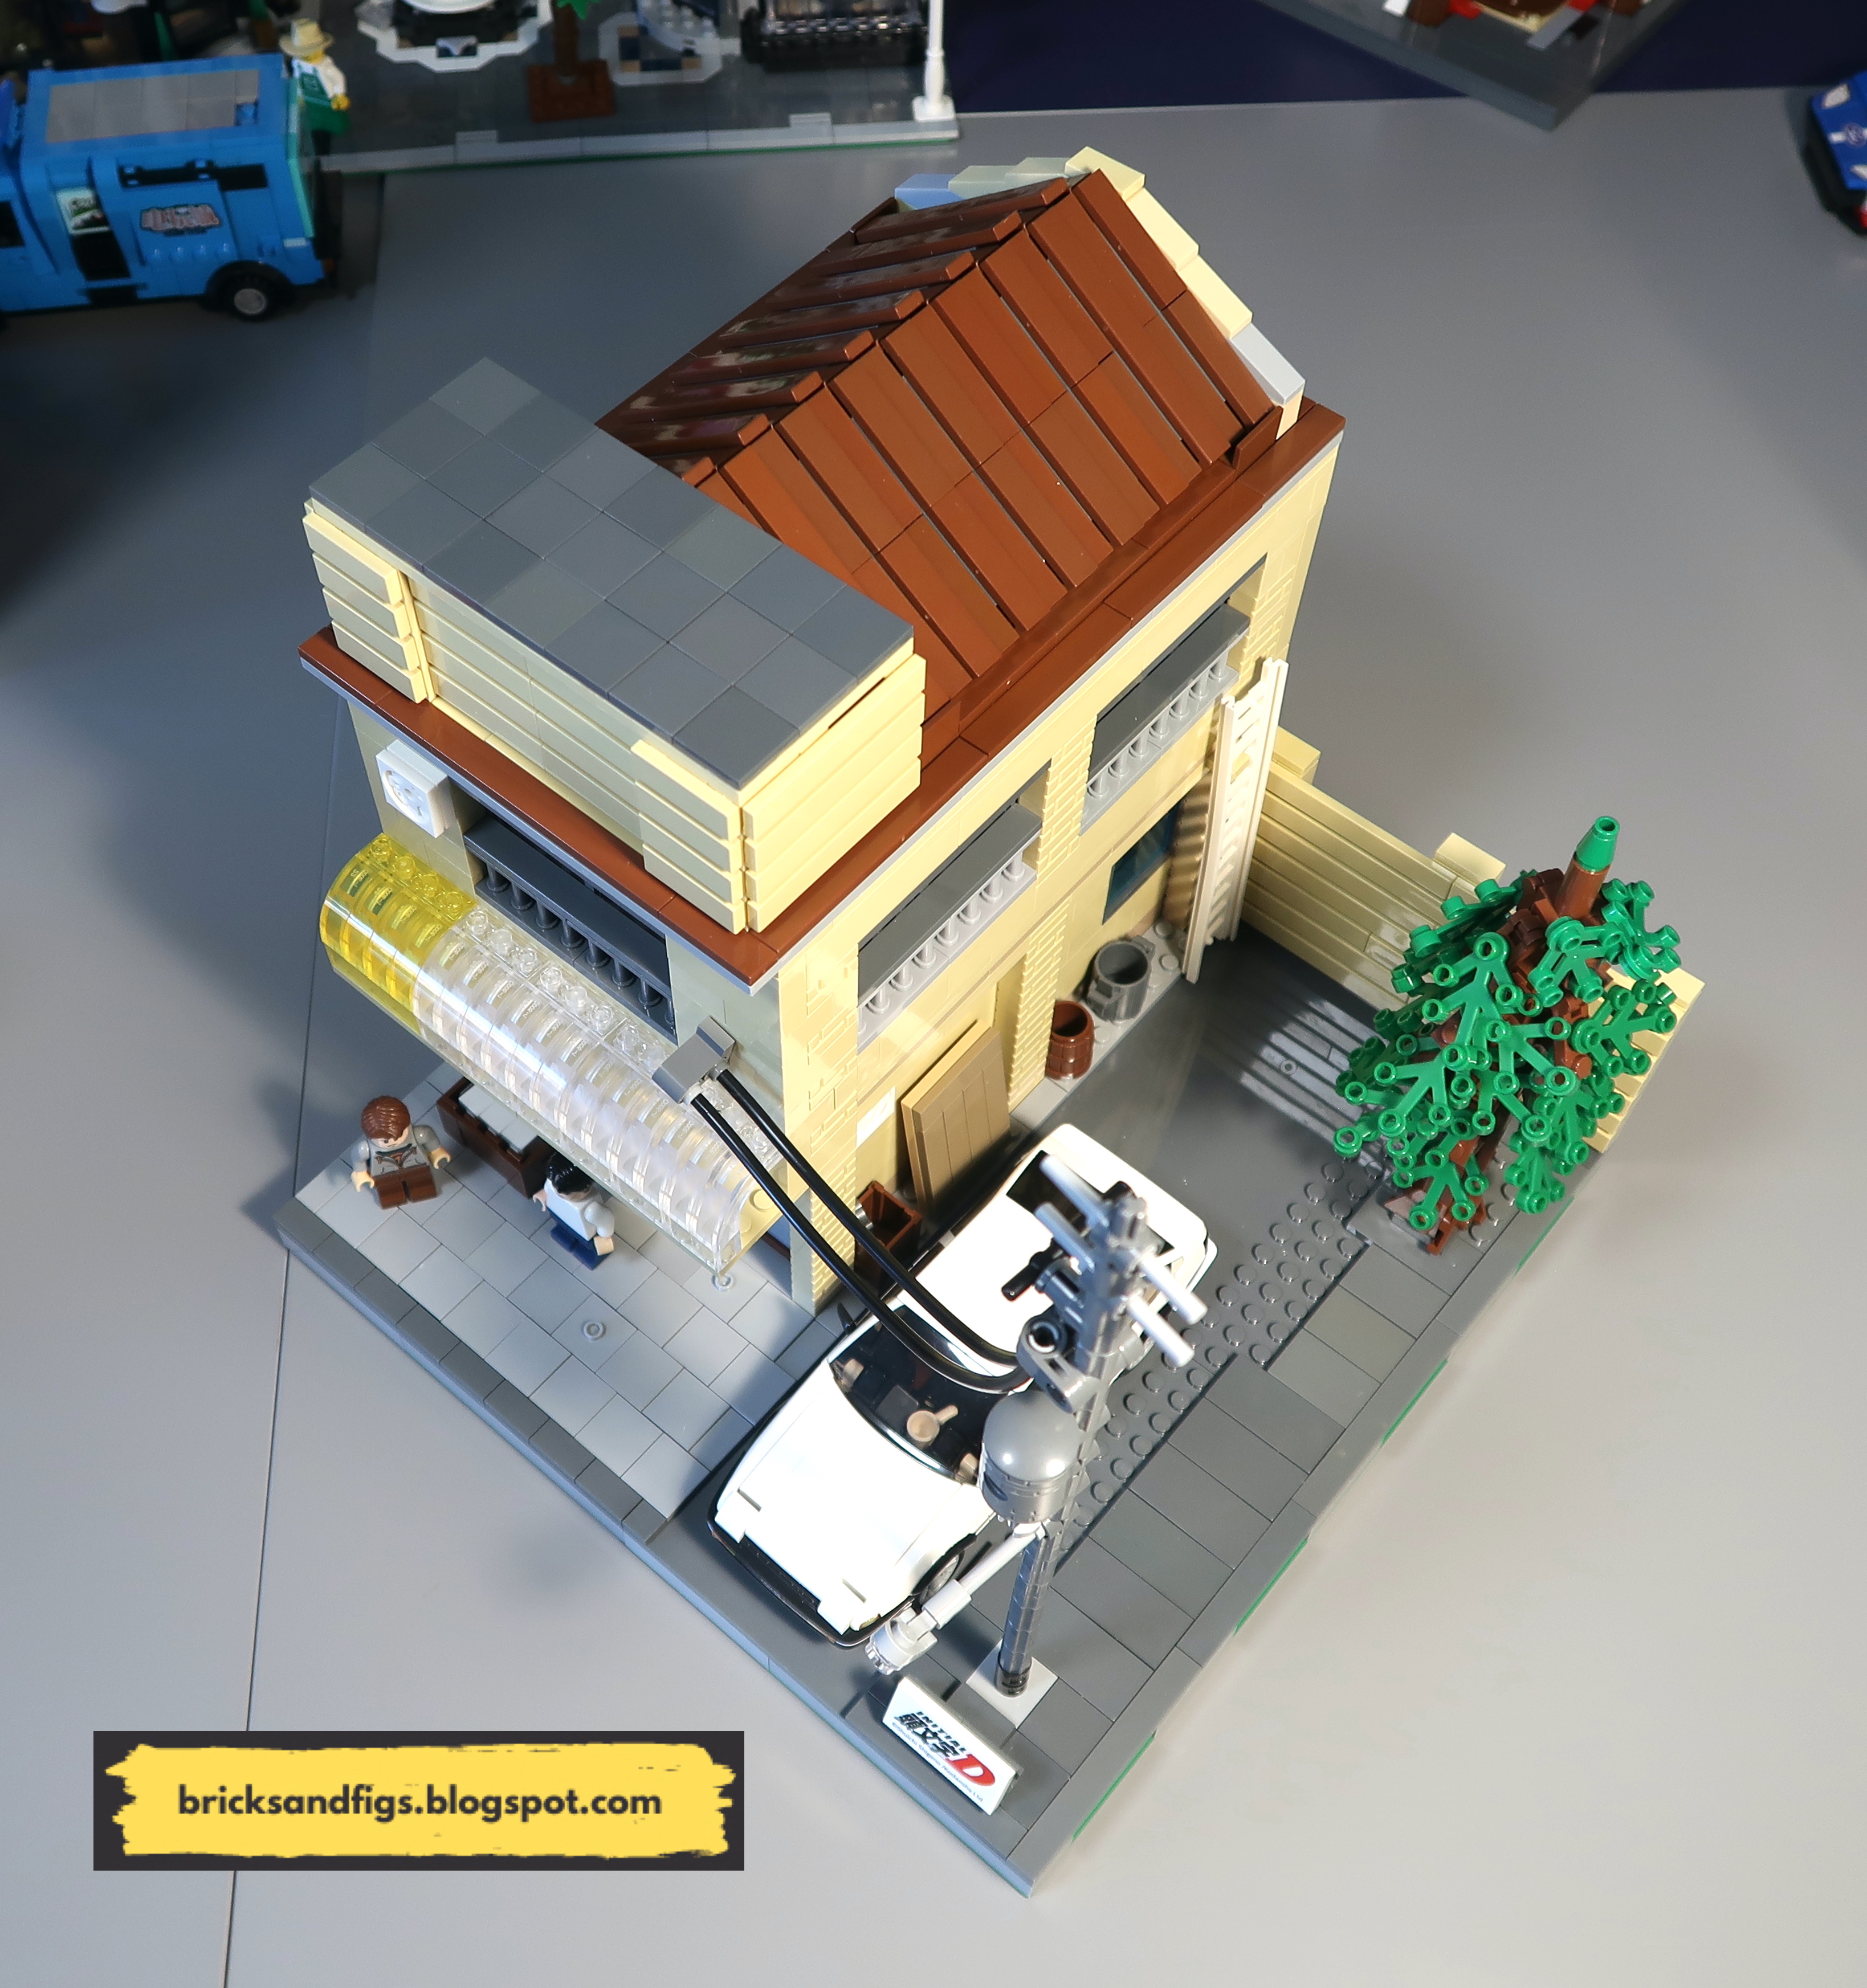
 I replicated the upper window design from the Fujiwara tofu shop but put
blinds in the windows instead of glass. The wooden slats on the right
side of the second floor serve to protect the fan/ventilation unit. I
wanted to keep the sidewalk more open so I put the takoyaki sign on the wall
of the second floor.
I replicated the upper window design from the Fujiwara tofu shop but put
blinds in the windows instead of glass. The wooden slats on the right
side of the second floor serve to protect the fan/ventilation unit. I
wanted to keep the sidewalk more open so I put the takoyaki sign on the wall
of the second floor.


You can find all my reviews for those buildings by the using the term "japanese style" in the search box of my blog.

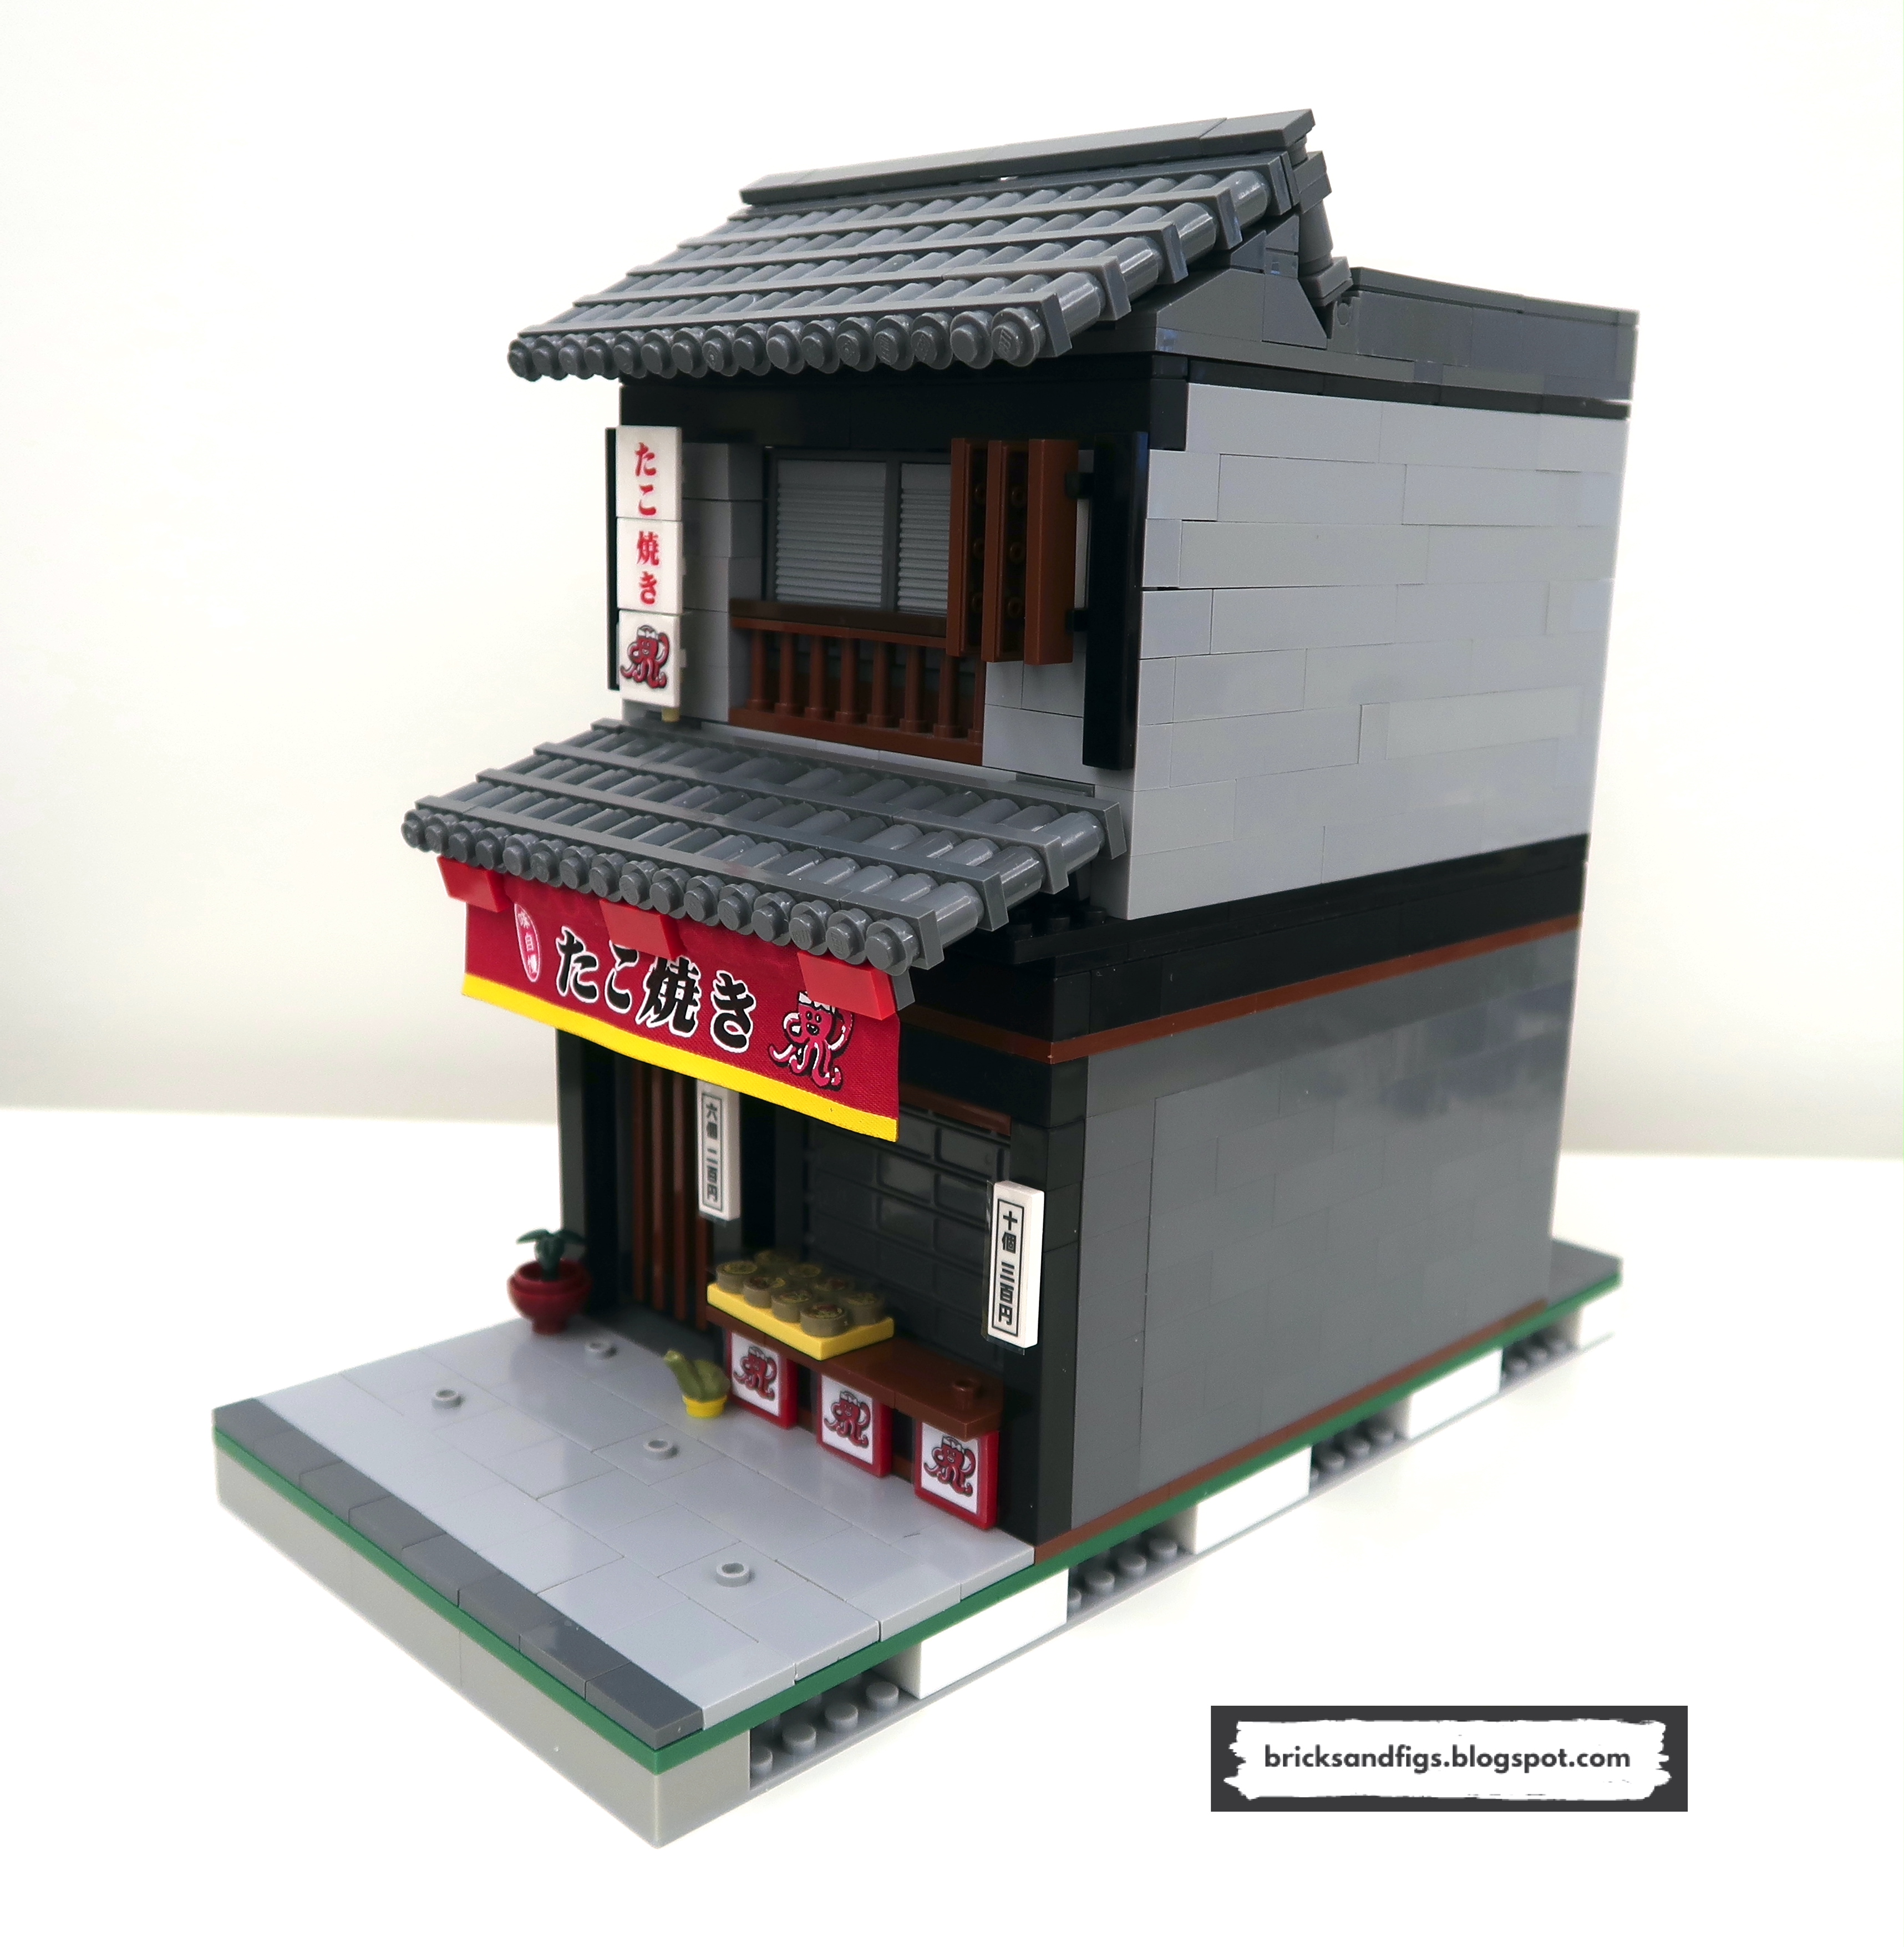
In case you're not familiar with Japanese architecture, a machiya is a
traditional townhouse with a narrow frontage, with earthen walls and baked
tile roofs.
 The front of the machiya traditionally served as a retail space with sliding
or rolling shutters that could be opened to display goods and wares.
See the wikipedia entry for
machiya if you'd like to learn more about this topic.
The front of the machiya traditionally served as a retail space with sliding
or rolling shutters that could be opened to display goods and wares.
See the wikipedia entry for
machiya if you'd like to learn more about this topic.

I looked at a lot of pictures of Japanese shops and machiyas so I tried to
replicate some of the key design elements for my modular building.
 I chose natural earth tones such as gray and brown for the machiya.
The black accents and highlights gives the building a modern vibe.
There is a takoyaki shop on the main floor. I plan to add a kitchen
and for the second floor, living quarters later on.
I chose natural earth tones such as gray and brown for the machiya.
The black accents and highlights gives the building a modern vibe.
There is a takoyaki shop on the main floor. I plan to add a kitchen
and for the second floor, living quarters later on.

 Just like the inside, the rear of the building is still a work in
progress. I'm thinking about relocating the back door to the right
hand side to put it under the stairs.
Just like the inside, the rear of the building is still a work in
progress. I'm thinking about relocating the back door to the right
hand side to put it under the stairs.

 In modular form, the rooftop, second floor and first floor are easily
accessible. I have installed a staircase to the second floor but as
mentioned earlier the interior is empty at the moment.
In modular form, the rooftop, second floor and first floor are easily
accessible. I have installed a staircase to the second floor but as
mentioned earlier the interior is empty at the moment.
 Here is the Takoyaki shop. The front door has a very contemporary look
with the wooden slats. It provides access to the inside of the shop
and also to the second floor via the stairs. I put a small planter and
a frog statue on either side of the doorway. The fabric banner
attaches to the underside of the awning.
Here is the Takoyaki shop. The front door has a very contemporary look
with the wooden slats. It provides access to the inside of the shop
and also to the second floor via the stairs. I put a small planter and
a frog statue on either side of the doorway. The fabric banner
attaches to the underside of the awning.

I'll provide more details about the takoyaki shop a bit later.


I might also refine the roof structure a bit, but it's sturdy enough and
provides a decent looking slope, so I dunno, maybe, maybe not.


In lieu of regular windows like in all of my other modular buildings, I used
a rollup garage door for the front of the shop.
 I bought the roll-up doors from Aliexpress. They come with all the
hinged door panels as well as the tracks on either side so that they can be
opened or closed.
I bought the roll-up doors from Aliexpress. They come with all the
hinged door panels as well as the tracks on either side so that they can be
opened or closed.

If I ever finish the interior, I'll put some minifigures behind the shop
counter. When the shop is closed the takoyaki would be moved
inside. There's room on the counter to install a display case.
Most of the signage is stickers with the exception of the fabric banner and
they all come from the small Sembo Takoyaki stall building set 601065 that I
bought back in March 2020. Even the takoyaki are stickers.


Here's the new machiya building next to the Fujiwara tofu shop on my ever
growing Japanese street.

Let me know what you think of my latest creation, thanks for looking!
Bye!