Saturday, March 7, 2020

Hsanhe 6411-2 McDonalds restaurant MOC modular building gets a drive thru lane!


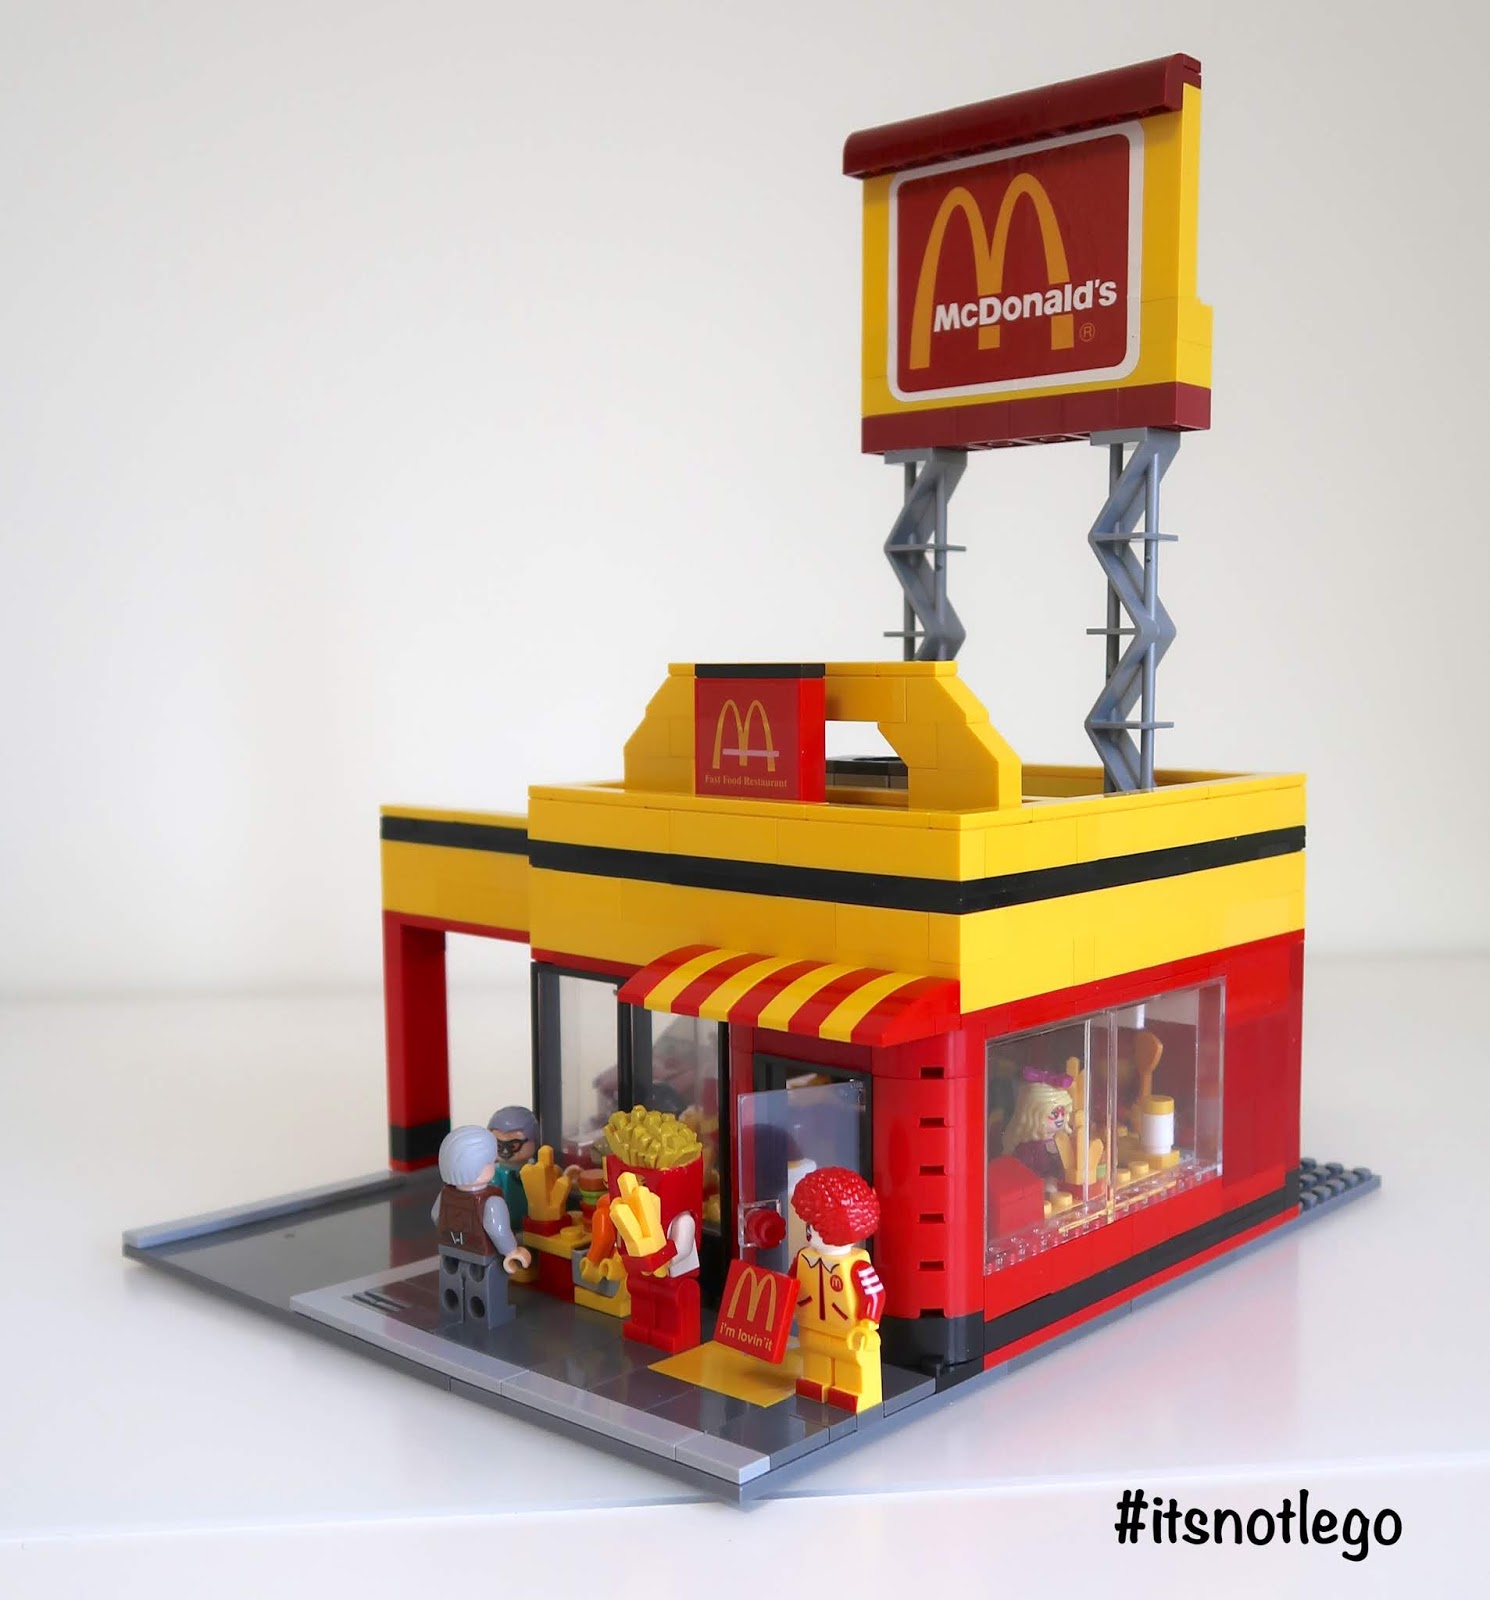
Hey, what's up, brick fans?  Today I'd like to give you a look at the latest updates to my McDonalds modular building. 

Here's a bit of background about this modular if you are new here.  The Hsanhe brick brand made a set of six small store fronts, each having about 200 pieces and included 2 minifigures.  I bought all six of the sets back in July 2016 and have since incorporated those shops into larger modulars or have made them into their own small modular buildings.

The McDonalds modular started life as one of those sets.  If you'd like to see how it has evolved in my not Lego brick collection, feel free to check out my other posts.

https://its-not-lego.blogspot.com/2016/09/hsanhe-6411-2-fast-food-restaurant.html

https://its-not-lego.blogspot.com/2018/02/hsanhe-6411-2-fast-food-restaurant-mod.html

https://its-not-lego.blogspot.com/2019/01/hsanhe-6411-2-mcdonalds-restaurant.html

Anyways, let's take a look at the latest enhancements!


In case, you haven't guessed, it's the addition of an actual drive thru lane. The lane widens the former baseplate by about 8 studs.  Although it seems trivial, the modification required me to rip out the previous baseplates and interior.  I used the 8x16 stud smooth surface baseplates from a couple of old Kazi brand fire station sets.

I added an extension and post over the drive thru lane to provide some continuity to the Mcdonalds restaurant.  I also made some minor changes to the takeout window, but I might have to adjust the height again.  I dunno, what do you think?  Is it too high or is it ok as is?


At the rear of the building, I added a new extension and repositioned the back door to open off to the side.  I made the awning 5 studs wide to cover the entire back door.  The rear extension is supposed to provide a secure room for supplies and deliveries  instead of just leaving them out in the open like that gray container.


The final modifications I made to the McDonalds restaurant was to add bigger picture windows to both sides of the building.  Initially I had planned for this building to be sandwiched in between other buildings, but with the added glazing, this modular could be placed as a stand-alone unit in a city layout.


I used smooth tiles over the picture windows so that I could just pop them out for easier access to parts of the restaurant.


Here's an overhead shot of the building with roof removed.  Tiling the extended are off the back is low priority and I'll probably get to it soon, unless I decide to re-do the back area.


 Other than that the interior remains the same as before with a seating area and stand up counter with trash bin.  And yes, I still need to make/print some stickers for the menu signage over the counter.

No changes to the roof either. It comes off in two pieces.


I'm pleased to report that there has been no turn over of the staff at the McDonalds since the last time we looked in and everyone continues to be fairly happy in their job.


Patrons come and go, so we get some regular guests and some new guests.

We got a small party of seniors visiting today plus the airline pilot who is picking up some takeout from the drive thru in his sporty convertible.


Here's a few more shots.


Thanks for popping by and see you next time!  

Thursday, January 30, 2020

The Gem Store, my latest Modular Building MOC


Hello and welcome back to Its Not Lego! My blog about not Lego building sets, minifigures and my own customs (MOCs).

The Gem Store and Studio Apartment


I just added the final pieces to my latest two storey modular building made from Not Lego bricks that I sourced from my old stash of bricks and Aliexpress.  It's a precious gem store on the main floor and a studio apartment on the second floor built on a standard 16 stud wide baseplate and then widened by 6 studs to accommodate the stairs going up to the apartment.

Quick Tour of the Outside


The front facade of the modular is clad with tan coloured masonry bricks and a small enclosure covers the front door, which is flanked by two lights.    A unique feature on this modular building is the security camera keeping a watchful eye on the everyone who passes by.

Here's another picture of the staircase that leads up to the second floor landing.  The tan and black colour scheme matches the building too.

Instead of a security camera out back, there's plenty of lighting, even under the stairwell.

One more glance at the outside before we head indoors.

Gem Store Interior on the main floor


It wasn't easy trying to take picture of the gem store's interior as this and the preceding pic will attest. 

Pulling the camera back a bit kind of helps with the view but I think I'm going to have to take out a wall to get a better look inside.

That bullet proof glass wall that separates the foyer and the security camera was obstructing our view, so now that those have been removed, let's take a closer look.

 There are three staff working in the gem store.  There's also a security guard for extra precaution.  The store isn't quite open for business yet, so the staff are busy setting things up.

There's a lot of precious stones up for sale.  Final inspection and placement is key to a good sale.   According to the clock it is about 8:30 am, got another hour or so before the shop opens.  Those metal bars on the window will stop all intruders.

 More gems on display around the store.  The security guard spends most days stationed by the front door.  Here's some more pics of the inside.


Let's hope all the precious gem stones are all accounted for.  Did you happen to notice how many security cameras were inside the store (including the ones on the removed wall)?

Studio Apartment interior on the second floor


We will once again take out some exterior walls to get a better look at  the inside of the apartment.

With the room divider removed, we can see the entire apartment.  The kitchen is the first room upon entering the apartment.  It includes a sink, stove, oven, fanhood and cabinets.

 The studio apartment is rented out to a university student.  Her classes don't start until later this morning, so she has time to do some quick vacuuming and eat breakfast, before heading out.

 It's not a luxurious apartment but it has all the essentials including a sofa, a comfy bed and three piece washroom.

Here's the view of the apartment with the other wall removed.

The student really takes pride in keeping her apartment neat and tidy. Hmm, something's missing in the bathroom though.

There, that's better.  Sometimes you don't notice what's missing until you take the pictures.


Gosh, my modular buildings all kind of look the same, don't you think?  Anyways, thanks for checking out my modular building.  Thumbs up or thumbs down?  Feel free to let me know what you think.    Thanks for looking and see you next time!

 For anyone looking for Lego style parts for your own MOCs, I've had great success with this Aliexpress store.
 

Wednesday, October 16, 2019

Custom modular building using the Hsanhe Starbucks and Lepin Sanctum Santorum


Hey, what's up?  Welcome back to BricksandFigs.blogspot.com!  Just wanted to show you what I've been working on since my last post.  I finally finished my latest modular building MOC which is made up of two parts:  the lower part of the building is the modified Hsanhe Starbucks shop set 6410-1, and the upper two floors is a derivative of the Peter Parker's apartment in the Lepin Sanctum Sanctorum set 07107.  My last update to the Hsanhe Starbucks shop back in August 2019 which you can read about here.

In case you're not familiar with the original Hsanhe and Lepin sets here's what we started with:

Hsanhe 6410-1 Corner Coffee aka Starbucks

Lepin 07107 Sanctum Sanctorum (Lego 76108)

Let's proceed with a closer look at the modular.


As mentioned previously, the first floor is a Starbucks shop, and the second and third floors make up Peter Parker's apartment.  The building sits on a 16x32 stud baseplate and has the obligatory sidewalk in front.  I've used mostly tan coloured bricks paired with the darker tan masonry bricks on the front of the upper floors.

If you exit the back of the Starbucks, there's a convenient patio with seating and umbrellas to enjoy your coffee.  This is also where Peter Parker/Spiderman enters his apartment using the lower and upper fire escape which is preserved from the Sanctum Sanctorum set.

Here's a closer look at the back patio that has seating for three.

Before we look at the interior, I want to point out that the Starbucks can be displayed by itself with the optional roof I made or as the three storey building which has a slight setback from the signage.

So I've got a fully furnished interior, but it's hard to see with the walls in place, so let's tear down one of the walls for a better view.

The green and tan floor tiles match the overall decor of the Starbucks.  You can see the baristas hard at work.  Spidey's just ordered his favorite brew.

Coffee maker with filter and pot occupies the back counter.

Just another view of the main floor.

Now let's inspect Peter Parker's apartment.

The second floor is accessed by the folding ladder.  I wonder if the spiderwebs will give it away that Spiderman lives here.

Removing the front wall exposes Spidey's kitchen and living room.

The kitchen has a fridge, stove and sink with upper and lower cabinets.

Spidey's settles into his comfy recliner after a hectic day of crime fighting. Time for his pizza dinner in front of his TV that sits on his wall to wall entertainment unit.

The exterior of the third floor looks the same as the second floor, except for the giant Starbucks logo plastered on the side of the building, making it visible from miles away.

Third floor fire escape and more spiderwebs.

Combined second and third floors.

Peter Parker's third floor is amply furnished with bed, desk, chair, computer, table lamp and bookshelf.

A better view of the third floor furnishings.

It took me awhile to figure out how to squeeze a three piece bath into this small apartment.

So this bathroom is similar to those found in Asia, where the toilet is located right in the shower area.  The sink is actually on top of the toilet where the water runoff is used to fill the toilet tank for flushing.  The shower consists of hot and cold taps and showerhead.  On the floor is the drain and a bottle of shampoo.

Here's some of my modified Hsanhe modulars all lined up side by side.  If you are looking to add the Hsanhe shops or the Lepin Sanctum Sanctorum to your collection, just follow the links below.

Thanks for visiting bricksandfigs.blogspot.com and see you next time!