I modded my Sembo shops!
Hi brick fans, thanks for dropping by! In case you are new here, my blog BricksandFigs is about reviews of not Lego minifigure I find on Aliexpress and showcasing my custom brick builds or as sometimes referred to, MOCs.
In today's post, I will show you the three changes I made to the recently acquired Japanese shop sets made by Sembo brand. For my initial build pics of these shops you can find that post here. Ok, let's go!
Change #1 - Adding a roof to the sushi shop
In this before picture of the sushi shop, you can see it has no roof, whereas all the other three shops do have roofs. To be consistent, I wanted to add a roof to the sushi shop. The easiest way to do this is to put another post on the right side and then attach a cross beam across the top. This will then provide support for a new roof plate covering the entire shop.
Change #2 - Adjust the counter heights
Sembo made the shops bigger, so you can appreciate all the little details but one thing I noticed is that they are slightly bigger than minifigure scale.In the case of this before picture of the takoyaki shop, you can see that the counter height is nearly the height of the girl minifigure. If that was in real life, the counter height could be close to 5 feet tall.
The counter height of the ramen shop is ok, until you realize those ramen bowls will probably be too high to eat out of, while sitting on the stools. This is also a before picture.
Lastly, the shaved ice shop is also way too high. There's no way the girl minifigure is going to reach the kakigori without her wearing it in the before picture.
Change #3 - Adjust the shop widths
My sidewalks are about 8 studs deep. If I subtract 8 studs from 32, I get 24 studs remaining. So the challenge is to get 2 shops side by side within 24 studs.
The results
Here are the Japanese themed Sembo shops with all the changes applied.
The sushi shop underwent the most changes, but I still couldn't get the counter height as low as I wanted. I was able to add the roof and move the signage to the front. The width was significantly reduced from 3 seats to only 2 seats. The ramen shop counter height was reduced and the shop width was only slightly decreased. The red lantern of the ramen shop was shifted from the side to the front.
Here's how the shops look around back.
Here's the newly modified Takoyaki shop and shaved ice shop. As you can see, the counters are much more accessible. The biggest challenge on these two shops was preserving the fabric banners. They take up a lot of room, so there's a bit of overhang. The red lantern on the takoyaki shop was also moved from side to front.
Here's the rear of the two aforementioned shops.
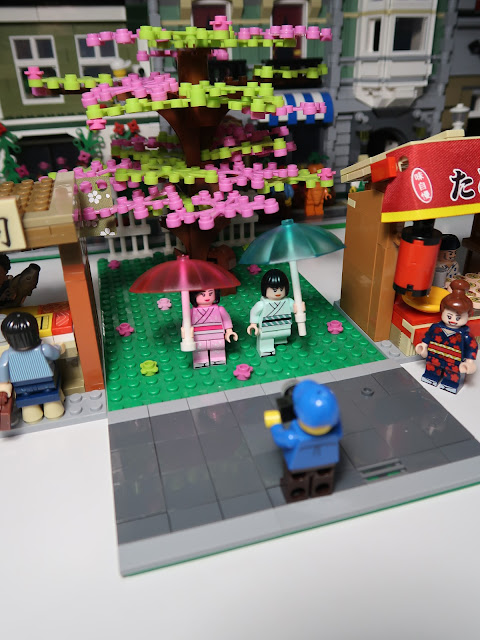
For most people, they would probably stop here, having accomplished the ambitious challenges, but I decided to go one step further and placed the shops on 16x32 baseplates complete with sidewalks and a brick wall.
Some WIP pictures
The entire display is comprised of 3 16x32 baseplates, two for the shops and one for the parkette/courtyard.
I don't have the baseplates permanently attached, because sometimes I'll want to display it this way.
Well, that's it! I hope you enjoyed looking at how I modified my Sembo shops and made a display for them. Please note that you cannot simply take the shops as they are and downsize them. I had to pull a lot of bricks from my brick stash and basically re-design and re-construct each shop from scratch.


No comments:
Post a Comment