Hey brick fans! Welcome back to my blog!
Today, I'll be reviewing a new LED lighting kit for my Town Hall modular building. It's from an established company called LeLightGo. They have quite an expansive collection of LED light kits available for your Lego and Lego compatible brick sets.
- Set/Kit: LeLightGo 10224 LED light kit for Town Hall modular Building
- Lego Compatible: Yes
- Instructions: Downloadable from the LeLightGo website
- Price: $39.99 USD (before discounts)
Unboxing
The LeLightGo light kit comes in a compact box with a sticker on the outside to identify the light kit. The SKU matches the Lego id for the Town Hall which is 10224.
Inside we find a pouch containing several small resealable bags of parts.
Here's the contents. Some of the seven bags are numbered and some are not. Note that there are no instructions or other pamphlets like other LED light kit brands. The instructions for each set can be found directly on the LeLightGo website as PDFs which can be downloaded to your computer.Here are the all the components from the unmarked bags. There's a USB connected battery box that uses three AAA batteries (not included) with a USB power cable and 6 port expansion board. The LED lamppost came in an unmarked bag, but I believe it should have been marked as bag number 1.
Here's the contents of bag 2. These are all the lighting components that will be used for the first floor of the Town Hall.
Bag 3 contains a thin light strip that will be installed inside the arch over the front entrance.
These are the lighting components in Bag 4 to illuminate the second floor interior and exterior.
Bag 5 contains a similar set of components to light up the third floor of the Town Hall. Additionally, there is one more light strand that will light up the bell tower.
LeLightGo was also very kind in sending me three sets of wireless connectors. The wireless connectors make it a lot easier to separate the floors in a modular building. I'm going to look at these wireless components in greater detail in a separate review.
Testing the Lights
Once everything is unpacked, it's advisable to test all of the lighting elements before installing them into your building block set. To do this, you will need to connect the USB plug to one of the expansion boards then, attach each of the LED lighting components. Then it is a matter of connecting the USB plug to the battery pack and turning it on. Visually verify that the light strands, and each of the lighting components are working properly.
The User guide provides some information, but it could be improved to provide more detailed information about how to connect the wires to the expansion boards for those who are new to LED lighting kits.
In the majority of cases, the lights should all work fine, but if you run into problems, simply contact LeLightGo as per their website. "If your kit doesn't work please contact us on support@lelightgo.com or via Facebook Messenger or Instagram. We will immediately solve your problem."
Alright, everything looks good, so it's time to light up my Town Hall modular building! We will download the lighting instructions for the Town Hall here. I'm looking for the set number which is 10224.
There are just pictures in the instructions and no words, so you just have to follow along. The pictures of each step are pretty straightforward on how to take apart some of the bricks in order to install the lighting elements. The first action to perform is to replace the existing lamp post with the LeLightGo version. This should be from Bag #1.
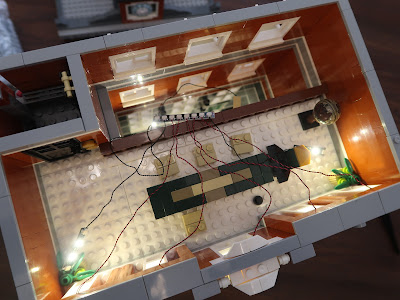
All the components from Bags 1, 2 and 3 are all connected to the same expansion board as per the instructions we downloaded.
Summary
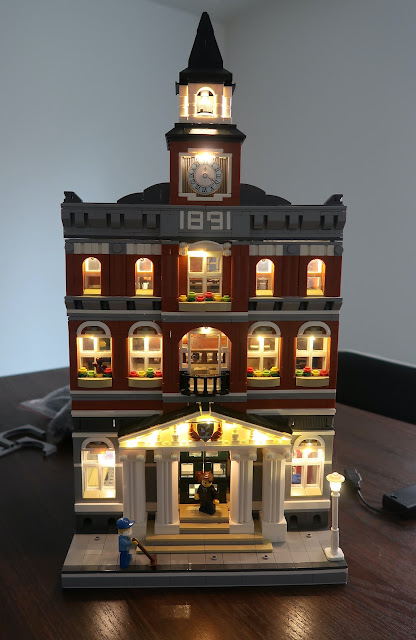
Because I'd had some exposure to other brands of Lego lighting kits, LeLightGo was very easy to install for me. It took me a total of about four hours to fully integrate the light kit into the modular building, basically one morning, and the results are excellent.
When plugging the wires into the expansion board, I noticed that they felt very secure, and not too loose. I plugged and unplugged the wires from the boards quite a number of times, and the wires held up well to all of my handling.
I would like to see the instructions improved to show the new light kit users how to plug the wires into the expansion boards, but that was my only nit.
The cost of the lighting kits that I found on the LeLightGo website are very competitive with the other lighting brands. I also liked that LeLightGo still has lighting kits for many of the older Lego style modular buildings, because similar light kits are discontinued on other LED lighting websites.
At the time of this writing, LeLightGo has a special promotion Buy One, Get 50% Off using the code Mar50 at checkout. You can also use my discount code ITSNOTLEGO to save 25% off anytime.
Having installed the LeLightGo lighting kit for the Town Hall modular building, I can say this is a quality product which I'd recommend to anyone who wants to light up the buildings in their Lego city.


