Friday, March 3, 2023

I made a Japanese style modular building from the Not Lego Sembo 601070 Crab Shop


Hello brick fans!  I'm here to show you my latest creation and yes, it's another modular building.

This set started life as the Sembo Crab Shop 601070 which were readily available on Aliexpress about three years ago.  The shop is one of four buildings in a series of Japanese themed facades.  The shops are harder to find these days, with only one or two stores on Aliexpress selling them.

This is how the set came originally before my modifications. It was basically a small building facade with a building that was about 8 studs deep with a minor interior setup.

As soon as I saw this set, I had to get it and turn it into a Lego style modular building.  Well, it's been three long years but I've finally achieved my goal.  

First off you will notice that I narrowed the facade of the shop from 20 studs wide to the standard 16 studs wide to make it consistent with all of my other 16 stud wide modular buildings.  The most challenging aspect of this was trimming off the sides of the fabric awning.  To get a nice straight edge, I used a paper cutter.  


There are four tan coloured arms that hold up the awning and they are attached by pre-made holes in the awning.  To make it fit 16 studs wide, I had to reposition the awning arms and then used a hole punch to put new holes to where the arms attached.

The tiled roof overhangs were originally only 2 studs deep on both the first and second floor. I expanded the roof tiles to be six studs deep.

The vertical sign was moved from the right side of the building to the left.

The entrance to the shop was relocated as was some of the signage.

After losing the one red crab that came with the set, I had to buy some replacement crabs and lobsters from Aliexpress.  That resulted in crab shop expanding its offerings to lobsters and fish as well, hence the new improved seafood setup in front of the shop.  

From the side, you can see that the building's proportions, extending all the way back to use up most of the 16x32 baseplate, which was converted to the MILS system.  To construct the shop building walls, I used a hodge-podge of bricks from various not Lego brands.  Definitely no colour consistency here!  

The first floor side wall can be popped off for picture taking, and the second floor can be removed entirely from the first floor.  The roof also comes off.

The rear of the building is rather plain looking, with only a door for deliveries and an empty crate to be returned to the seafood wholesaler.  I decided to make all the second floor windows asymmetrical, just because.

More unmatched brick colours, yuck!  The white patch of bricks is the background for one of the fish tanks inside.  Those black squares are actually dark tinted windows, courtesy of some set from Sluban.  The crab shop can be displayed either as a standalone building or part of a row of Japanese themed shops.


Before we tour the interior, I just want to say, this awesome crab is purely the reason why I was drawn to this set.  It reminds me of the actually crab restaurants that can be found in Osaka, Japan.  I had to extend the vertical sign out further from the building to make it more visible.  All of the Sembo stickers that came the set are bit too oversized for my liking.


Ok, here we are inside the shop, looking out.  As you can see we have the shop owner displaying his fresh seafood to anyone who will notice.  He's one of the original minifigures that came with the set and he even has a crab on the back of his uniform, which I didn't notice until just now, lol.

I built this giant tank of seafood for the storefront.  At the end of the day, you can actually slide the front door closed.  I borrowed that idea from the Cada Coffee shop.


As you come into the store you are greeted by a large fish tank on the wall and more crates of crabs and lobsters.  The main floor of the shop is divided into two areas. The front of the shop is where you can buy seafood to go, but also if you want to dine in, there is a kitchen in the back, where they will prepare the seafood how you like it.


The kitchen is comprised of an oversized sink to rinse off the seafood before cooking, a counter with various ingredients, a four burner stove, some kitchen pots and pans and a couple of steamers.  I managed to squeeze in some extra storage above the counter.

The original Sembo set provided a small second floor but no stairs to access it.  That's been resolved in my modifications.  More room for crates and stuff under the stairs plus access out to the back.


The fabric curtain that hangs in the archway is called a noren and it came with the Sembo set.  I've just moved it inside from its original location.


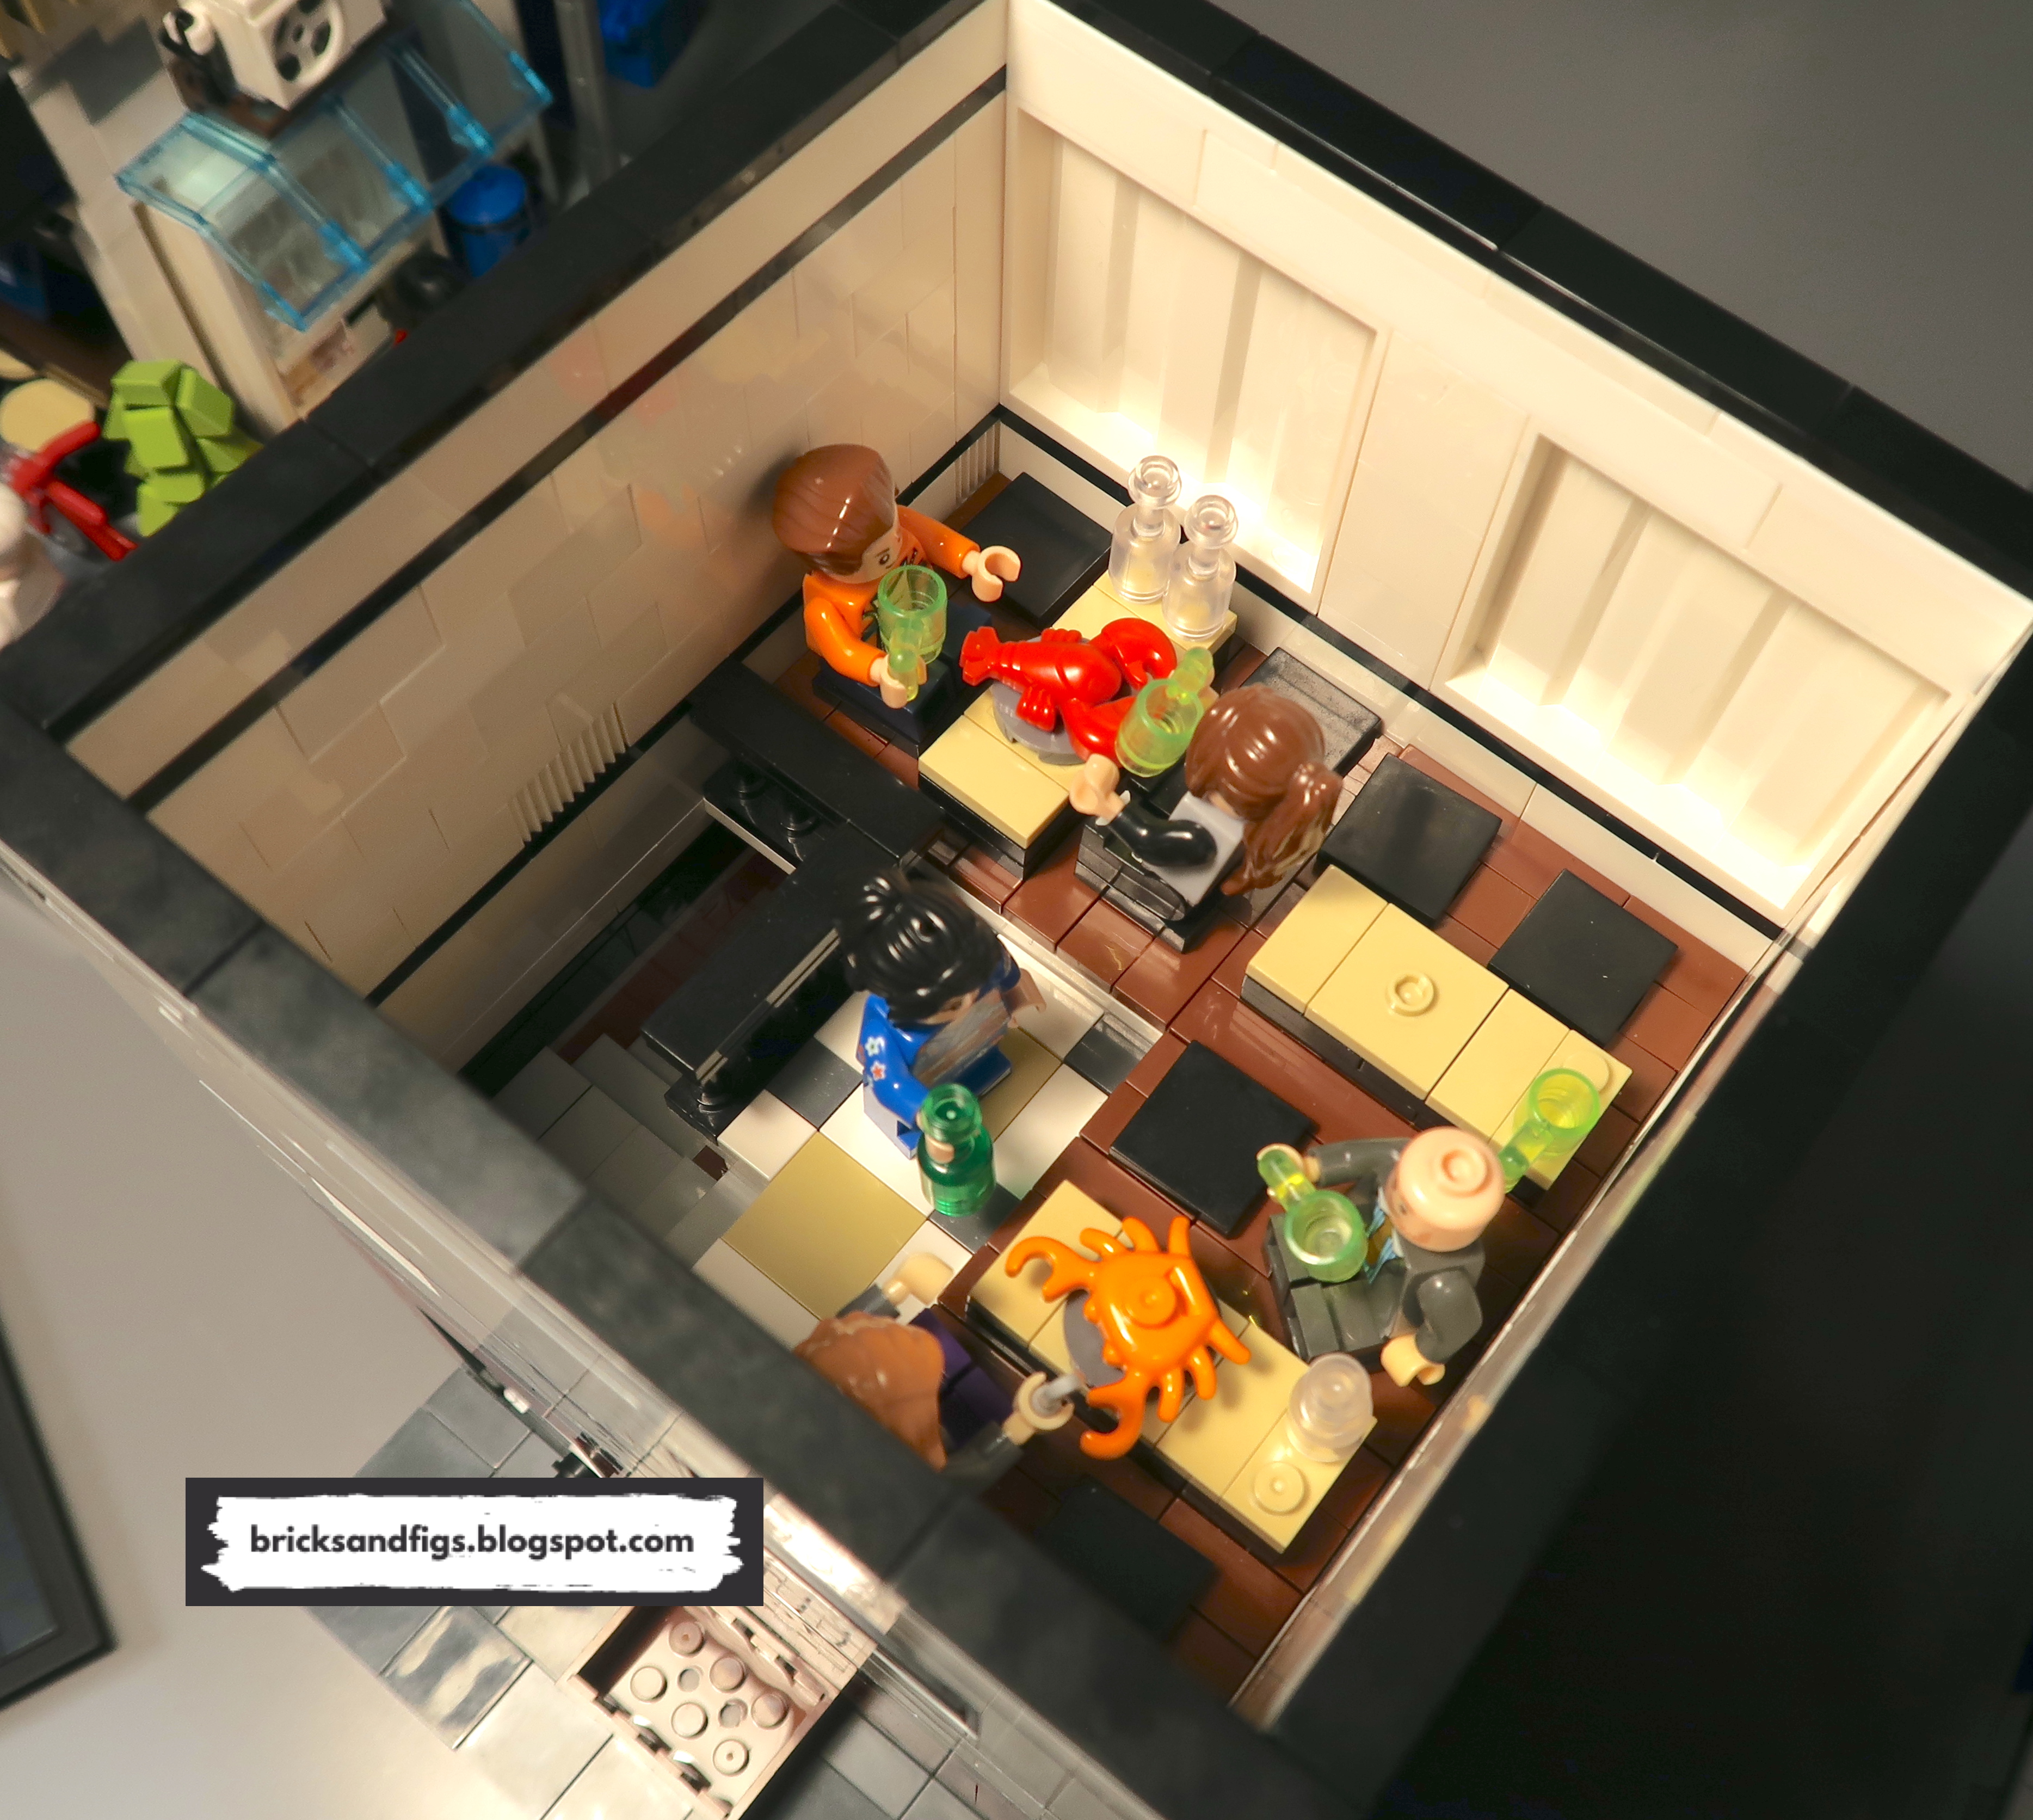
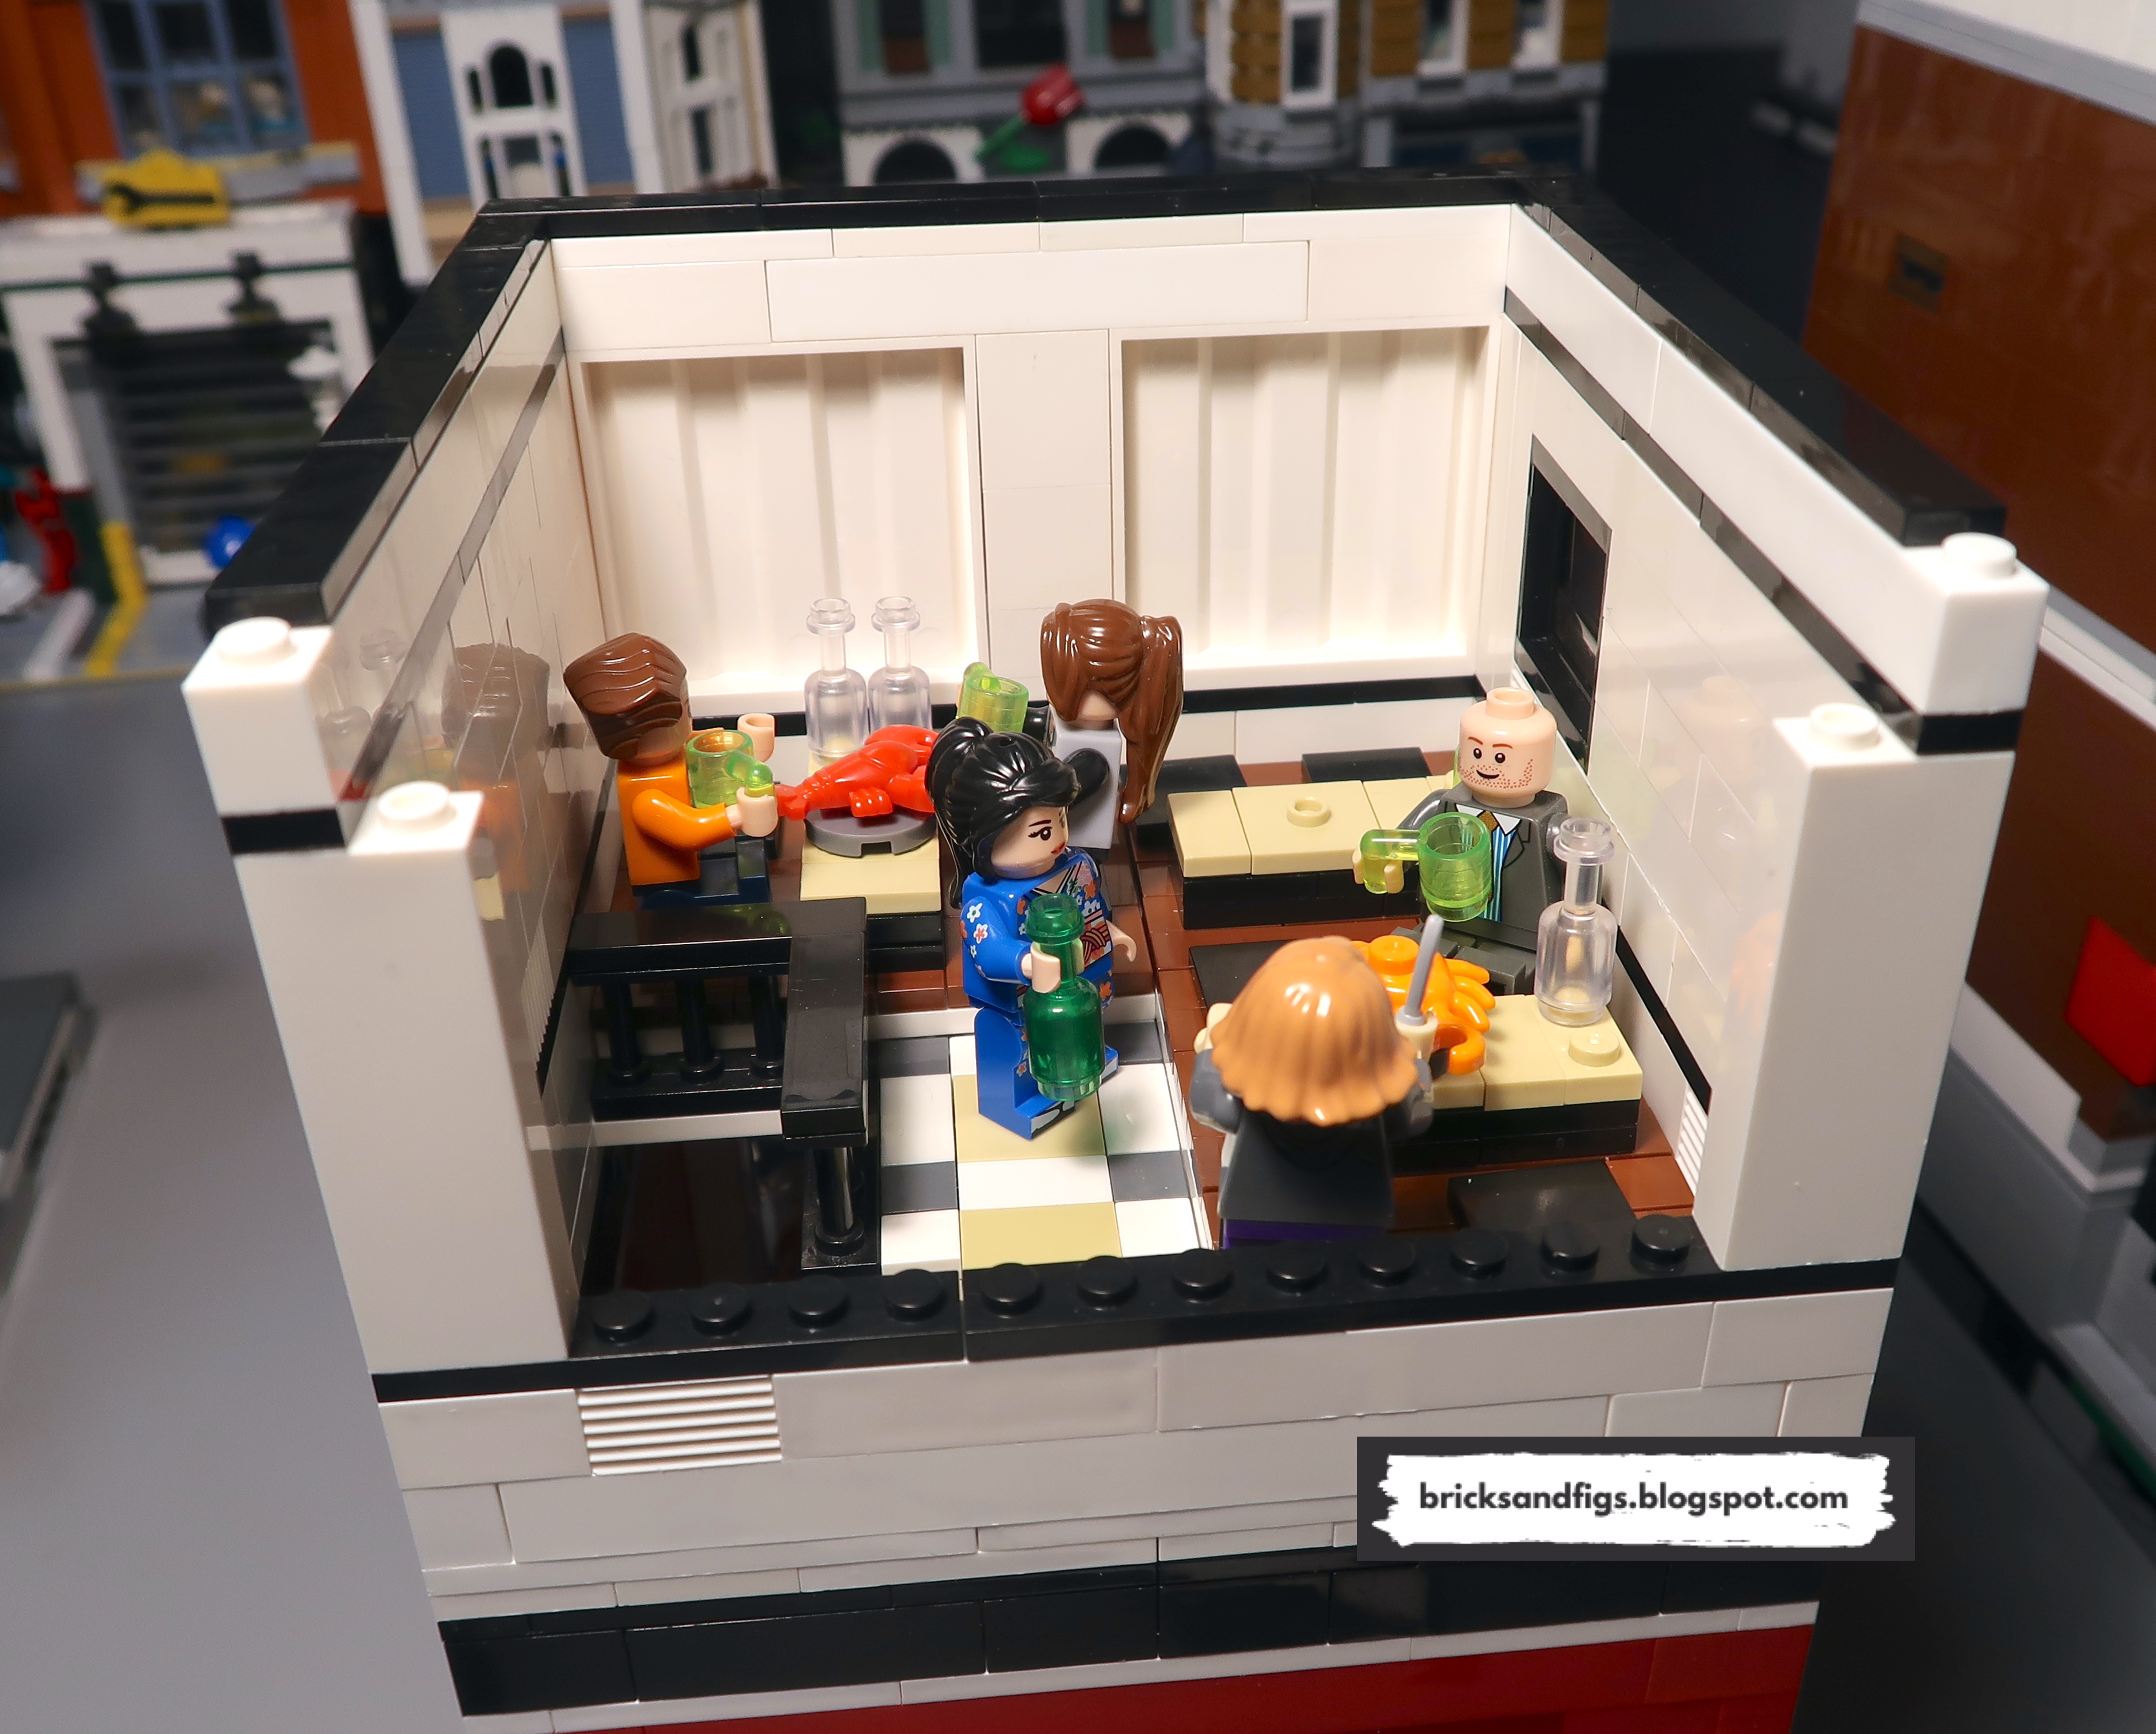
Coming up the stairs to the second floor, we find the dining room.  There's three tables with an entire seating capacity of ten customers.  


This restaurant has the traditional raised platform where you dine, sitting on the black cushions which are on the floor.

This picture was taken before I decided to add another window into building.  Oh, here's that beer that we ordered, Kanpai!   There were two other minifigures that came with the Sembo set, but I've repurposed them elsewhere, I think.  All of the figures shown here are from my own collection.


Here's the shop pictured with all of my Cada Japanese themed buildings.  Please check out my reviews for those if you haven't already.

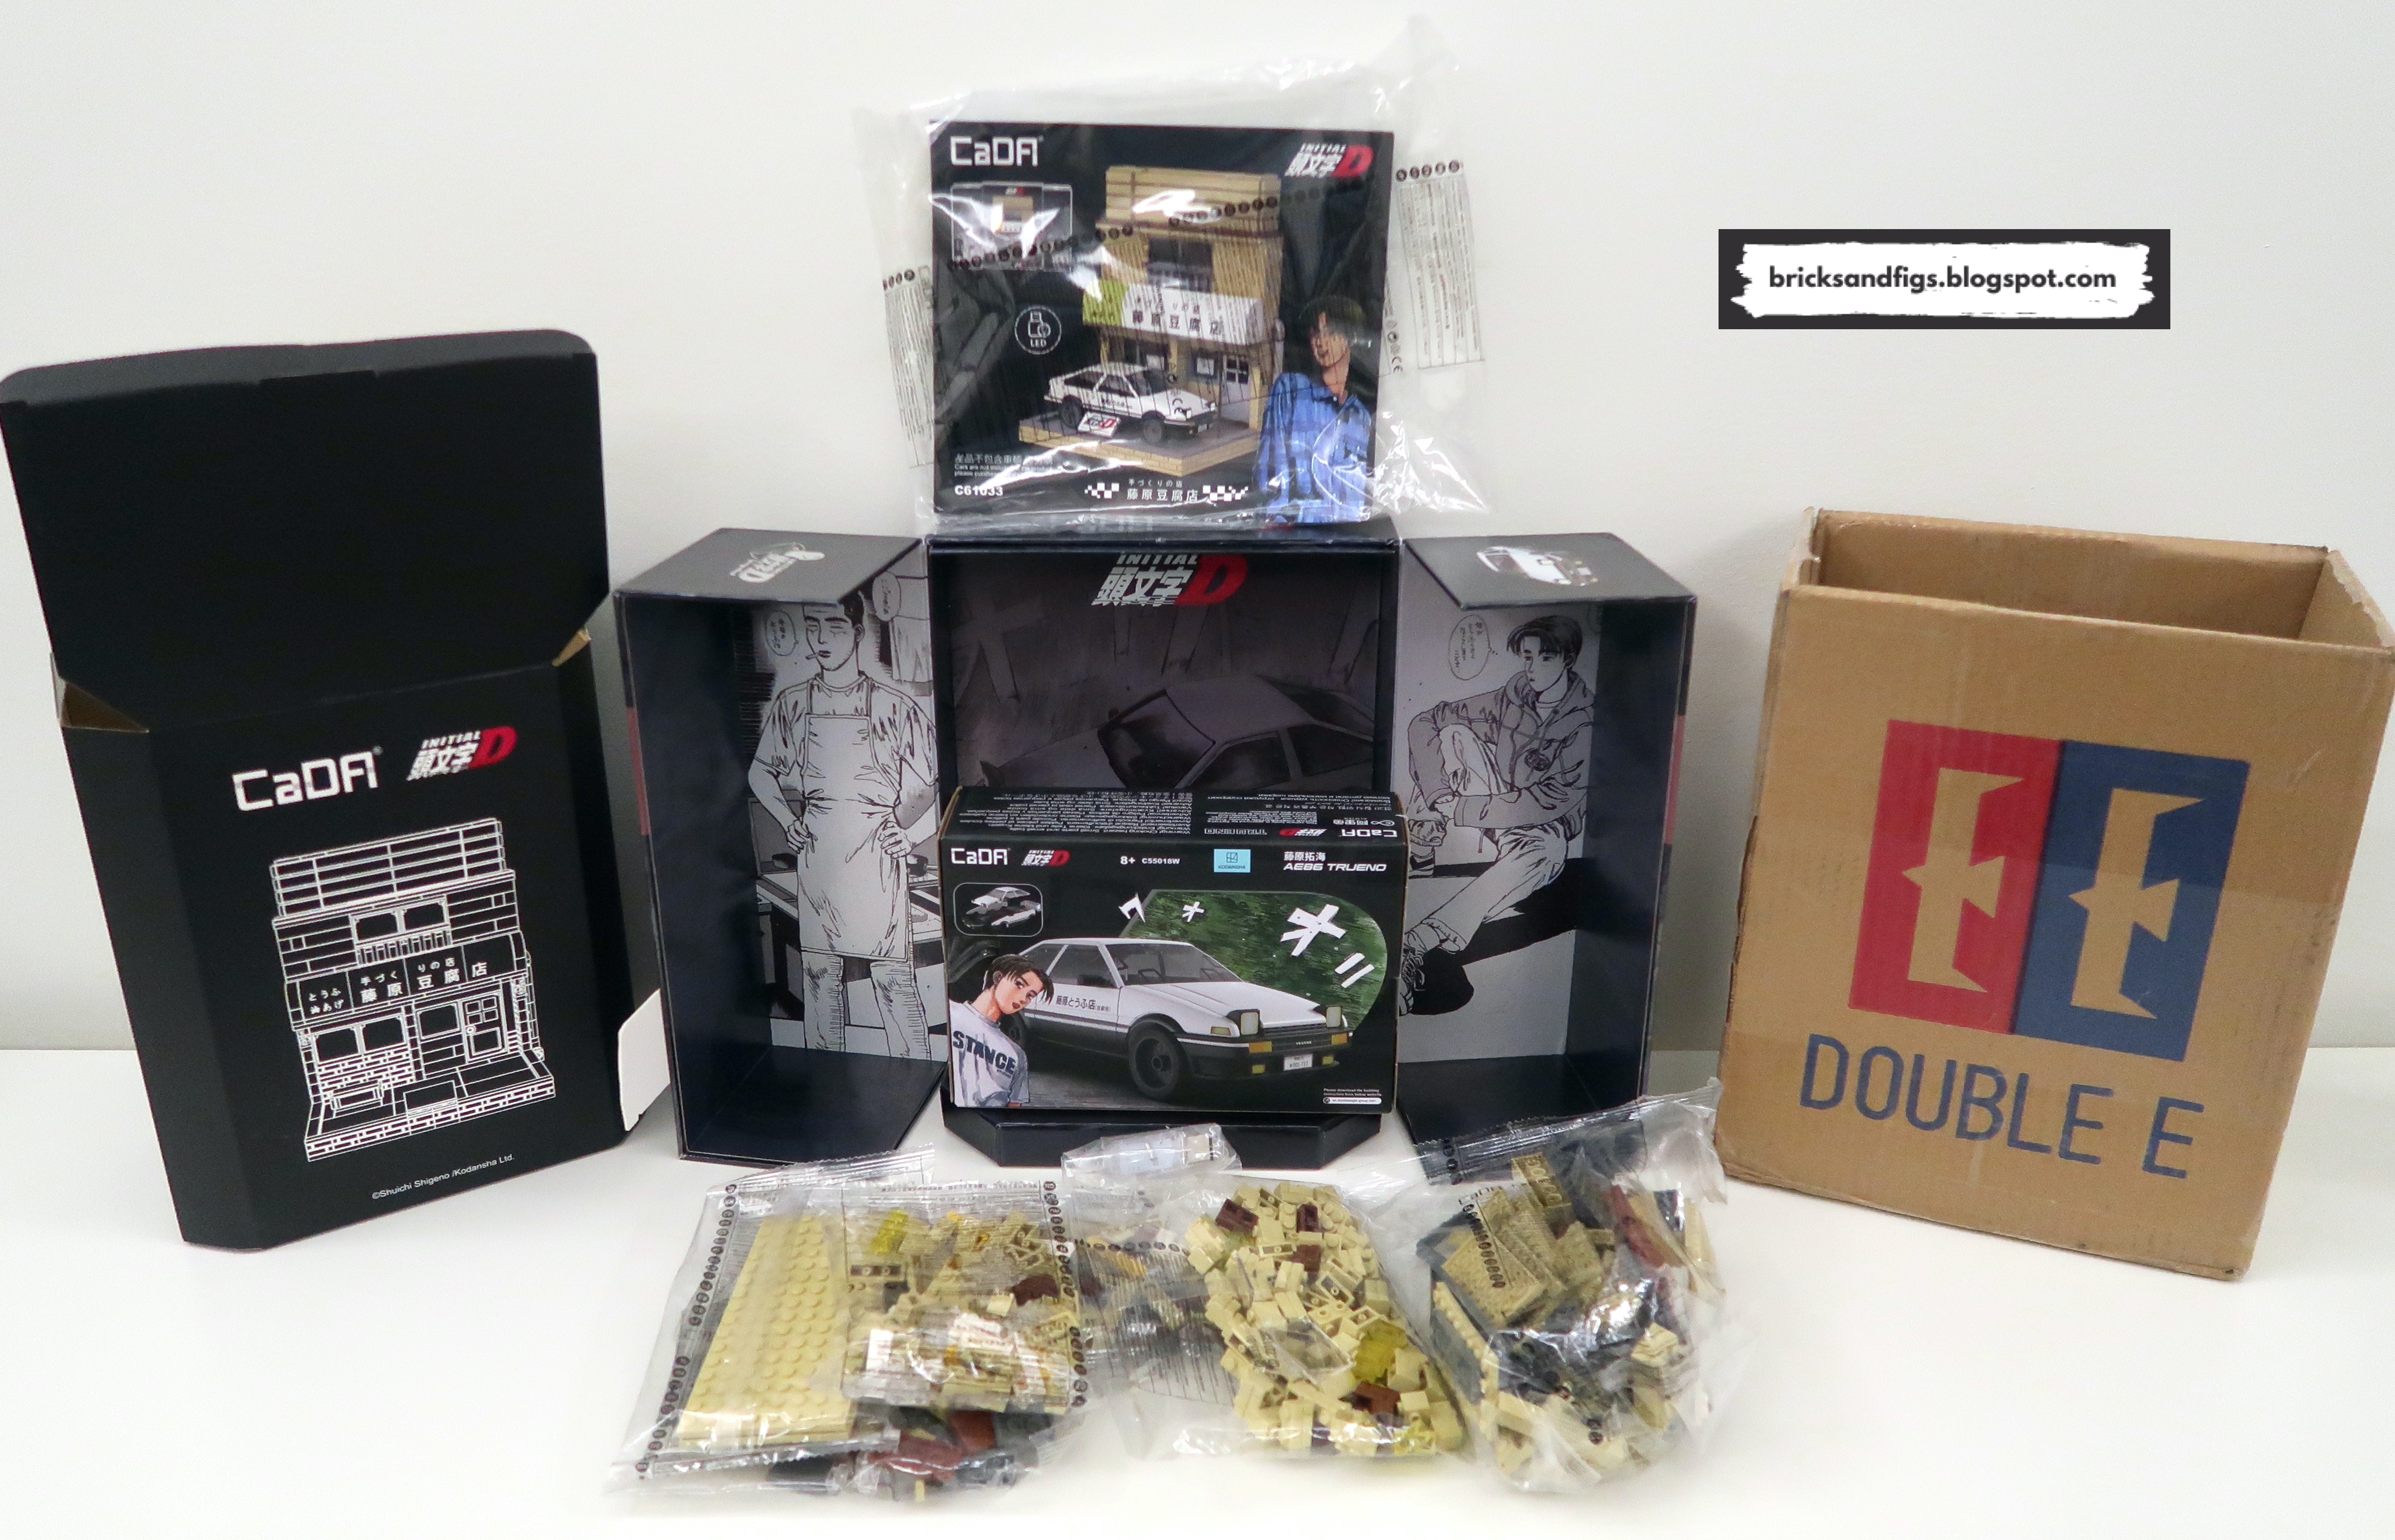
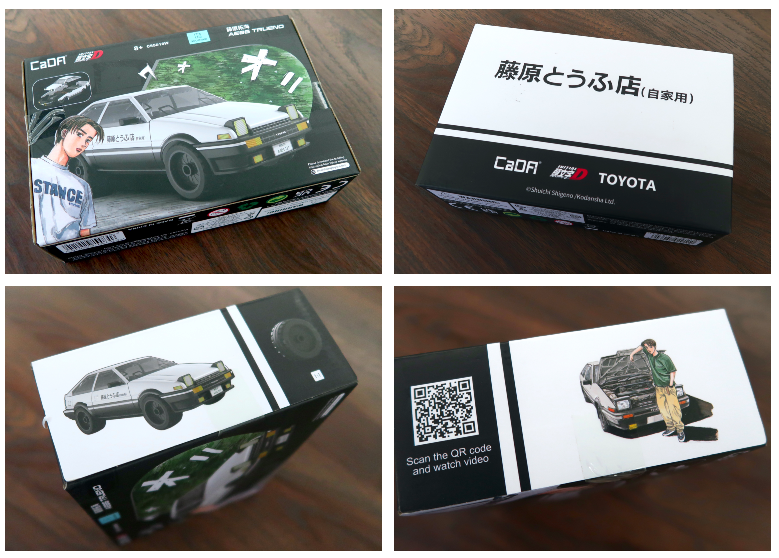
Well, that concludes our tour of the modified Sembo Crab Shop.  If you want to buy the original Sembo crab shop, you can find it on Aliexpress by clicking the picture below or searching for the term Japanese Streetview.  Thanks for looking and see you in my next post! Bye!

Saturday, February 25, 2023

How I enhanced the Cada C55018W Initial D AE86 Trueno (started out as a review)


*the above picture is not mine.  I found it on the internet.

Hello brick fans!  Just wanted to let you know that I recently won an Initial D prize pack that was part of a Cada contest on Facebook.  The prize pack included two small sets from Cada, the Fujiwara Tofu Shop C61033W and this Toyota AE86 C55018W.   

If you are interested in these sets, be sure to check out my Cada discount code at the end of this post!

Thank you Cada!

In this post I'll do a quick review of the Toyota AE86 set, a black and white drift car featured in the very popular anime series called Initial D by manga author Shuichi Shigeno.  The owner of a Tofu shop uses the car to make deliveries and ultimately it becomes a race car.

Here's some pictures I found on the internet of the featured vehicle.


Shuichi Shigeno standing next to his real AE86.

You can read more about it on the Initial D wiki page which can be found here: https://initiald.fandom.com/wiki/Initial_D_Wiki

After the short set review, I will detail the enhancements I made to my AE86 model.

Set Details

Brand: Cada

Set: C55018W Initial D Toyota AE86 Trueno

Piece count: 72pcs

Numbered bags? No

Stickers or printed parts? Both

Missing or deformed pieces: No

Extra parts: No

Minifigures: No

Lighting kit: No

Brick Quality and Clutch: Great

Measurements (approx): 1/35 scale

Age Rating: 8+


Unboxing

The Toyota AE86 set came in it's own box, but packaged together with the Tofu shop set.  Initial D artwork is featured on the cover of the box.  On the back of the box is the name of the Fujiwara Tofu Shop.


Inside the box, you get a thin booklet for the instructions, two sticker sheets and four bags of parts.  According to the Cada website there are a total of 72 pieces.


Unpacked, I counted a total of 75 pieces, 3 more than what Cada indicated.  Thr body panels, front and rear bumpers have printed details, but the fine details such as badging, lighting and license plates are added via the included stickers.

Assembling the AE86


As you can imagine, with only 75 parts, this is a very easy set to put together, great for kids.  

* not my pic, I forgot to take a shot like this.  Basically this is the original interior.

The Cada set is sort of a hybrid between a Lego style set and a plastic model kit with the pre-molded body panels, hood and bumpers.  The entire roof attached to the window panel but the rear window is blacked out.  You can even open the hood to display the engine block.  Other features include the side mirrors and the pop up headlights.

On the downside of this set, you can't open the doors or access the trunk, since there is no interior to speak of.  The car is supposed to be 1/35 scale which makes it slightly larger than minifigure scale which is estimated to be around 1/45 scale.  As such, no minifigures are provided with this set either.  But as we find out later, we can still put one inside.

So, I don't know why, but I got really distracted by the size of the wheels on the AE86. When I put them on the car, they look like giant marshmallows or steamrollers, to me anyways.  

At this point, I stopped taking pictures of the model and started rummaging through my parts bin to see if I could find some smaller wheels.  That's why you don't see any pictures of my finished original model, it's because I had already started to modify it.

Enhancing the AE86

Pictured above left are the original wheels and technic attachment axles used by Cada for the AE86.  On the right is the smaller diameter wheel and brick axle I decided to use instead.  It's a simple part swap that can be done by anyone if you have the parts.  

These are the same wheels used for the Lego caravan set 60182.

There's a lot more clearance in the wheel wells with the smaller tires.

I like that the new wheels actually lowers the stance of the car.  It actually looks more proportionate in my opinion.  So did anyone notice anything else what else looks different with the car?   There's actually two other things!

Did you guess the headlights?  Good for you!  So I also discovered that by replacing the headlights with a curved 1x1 brick, it puts the AE86 headlights into daytime driving mode.

Before.

After.  And I can swap the bricks anytime depending on how I want to display the AE86.


Here's a few more pictures.


I don't normally apply stickers to my building block sets, but the AE86 just wouldn't be the same without the Fujiwara Tofu Shop logo.

Are you wondering what's under the hood?  Oh yes, that may or may not be my minifigure representation of Bunta Fujiwara.  He was the best I could cobble together with the minifig pieces I had.  My answer on whether the Cada AE86 is minifigure compatible or not is Yes!

It's hard to see with the tinted windows, but you can definitely put a minifigure inside.

C'mon, you didn't really think I could enhance the exterior, yet leave the interior alone did you?  

There wasn't any interior in the kit, but I managed to squeeze as much detail as I could into the AE86.  This includes, a dashboard and steering wheel, a cup of water, and a stick shifter.   Initial D fans will understand the meaning of the cup.

My interpretation of tofu for delivery, lol.

Due to headroom constraints with minifigure added to the interior, I couldn't also add in a seat, so this was all I could do.  Can it be made better?  Let me know.


Some final thoughts.  Fit and finish were pretty good.  Some minor smudges on my roof panel which you might not notice if you don't look too closely.  All the parts fit together well and nothing fell off when handled.  The car rolls both well with the original and the retrofitted wheels.  I'm going to give this set a 4 out of 5 ,with points deducted for the large wheels, the lack of interior, the lack of minifigures and all of the stickers.  But it displays really well, if you just swap out the wheels.

Anyways, I hope you've had as much fun looking at the pictures, as I've had taking them.   Thanks again to Cada for the contest!

All three of the Initial D sets are available for purchase on the Cada website. Use my coupon code ITSNOTLEGO to save 5% at checkout.


See ya next time, bye!